1) What you will need to make these paper craft helmet models:
some glue, a paper knife, cello tape, a pair of scissors, the downloaded data of your choice and a thick piece of paper.
*Recommendations: inkjet papers and "graphic" setting for printers.
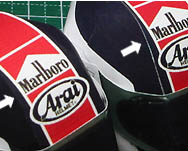
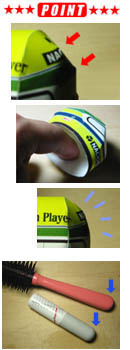
2) Cut around or along the light blue line. Depending on the colour of the helmet, it may be a bit difficult to see the boarder line. Then, cut the red lines as well. (Note that they are symmetrical.)
*The arrowed areas are where you stick some glue onto (we will call it a "gluing-bit") and insert very light and shallow lines, probably with the back of the paper knife (the non-sharp side) and lightly bend it as well.
3) The pedestal "to be" parts are better to be stuck onto a thick piece of paper with some glue and be cut again.
*Make a very light and shallow line on the red lines and bend them.
When cutting any piece of paper, the cut-away line shows-up unwanted white line. To avoid that white line spoiling the finish, colour in those white lines with water colours or felt tip pen, it will look much neater.
(Note: You will be using glue on top of that coloured-in surface and it may smudge when gluing if you use water colours.)
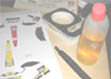
5) Gluing
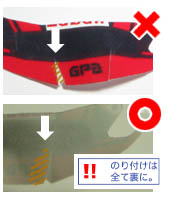
As shown on the right hand side diagram, it is better always to glue the reverse side.
As an example, if you try gluing on the surface, as the gluing-bit is not wide enough, therefore the excessive glue will ruin the coloured side.
(When putting glues on, only put them very lightly and stick the paper together with the pressure from the fingers. If there is any excessive glue coming out when pressuring the paper that indicates that you have put too much.)
6) Gluing 2
Stick on starting from the chin moving up and also lining up the edge.
Stick on the visor as well.
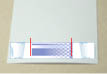
7) Cut an appropriate amount (3.5cm-4.0cm) of cello tape and cut incisions in every 5mm (does not have to be exactly 5mm).
All of those 5mm tags act as gluing-bits. The recommendation is that you stick 7 tags (gluing-bits) to each side.
(Alternatively, the width of the cello tape could be reduce and place the tags more finely.)
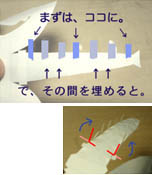
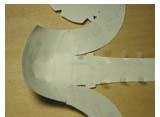
8) Stick the tags (5mm width bits) to the reverse side of the open diagram (as shown on the left).
Then, if you bend the tags at 90 degrees from the edge, it will make your life a lot easier later.
9) Cello tapes should be stuck from the chin towards the back in sequence.
The black rim on the bottom rear of the helmet should be glued when capped from the both sides.
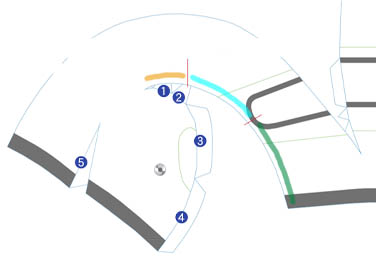
10) Gluing the sides
First, glue together the (1)(2) marked side to the //// marked side's reverse side.
Then, glue the (4) marked side to the //// marked side's reverse side.
Join the black coloured edge or the design.
Then, glue the (3) marked side to the //// marked side's reverse side.
At this point, the cut-away lines of the (both) sides should slightly be covering up. Again, join them with glue according to the design.
Lastly, glue on the (5) marked side.
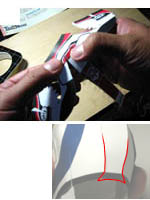
Tips
Even if you follow the instructions perfectly, some unwanted sharp edges will appear.
To smooth this out, place a finger on the inside of the unwanted and rub it against a hard flat edge like a table.
The edge has disappeared (it may create some crease).
Furthermore, instead of using your fingers, is you use a round plastic with the diameter of around 2cm like the one in the diagram on the left, it will hardly make crease.
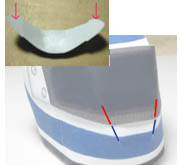
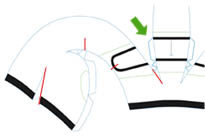
11) Attaching the visor
Put some glue onto all of the reverse side of the visor holder.
Find the middle by aiming at the imaginary red and blue lines shown on the picture on the left.
Join the top and bottom light green lines drawn on the helmet.
When you have finished aligning, pressure bond the already glued visor holder.
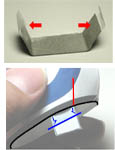
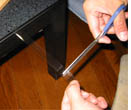
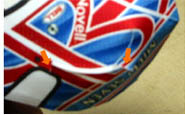
12) Attaching the base.
Stick a piece of cello tape each to the two arrowed places. The cello tapes should be sticking out about a centimetre when stuck.
Stick them onto the place shown on the picture.
Join the line, just below the arrow of the pedestal with the black edge on the bottom of the helmet.